From the time I was 12 years old, I've been a hunter. My dad took me every year as a kid and then as an adult I also hunted with my husband's family. It's just kinda what you did. Living in rural PA, the first day of buck season is like a holiday...no school, many folks don't have to work, the lines of cars traveling to even more rural areas is almost like a parade with folks dressed in camo and florescent orange, with racks on their cars to carry home the harvest. Camps all over the mountain for such a time as this. Apparently it's not like this in other places because folks new to the area just stand back in awe as we transform into our hunting mentality with all the excitement of the beginning of baseball season in the spring. It's a serious business.
Proper training is a must and all license holders must first graduate from a hunter's safety program where they learn about hunting and most importantly, how to safely handle a firearm. I know this gives people the creeps and accidents do happen. Still, if kids are not taught the proper way to safely handle a gun, their curiosity will often be the reason for shooting accidents in the home and field. And as far as crime goes, if a person wants to commit a crime with a gun, chances are good that the gun will be stolen and used whether safe training has occurred or not. Now, this isn't my platform about whether guns and gun ownership are proportionate to crime rates so I'll just stop here.
As part of a sustainable life style, hunting and fishing can provide lean, grass fed (or stream fed) meat for the family nearly year round. I'll admit that while we've never hunted merely for sport and always consumed what we've harvested, I didn't really look at it as sustainability until the last 12-15 years. My daughter was diagnosed with irritable bowel syndrome at the age of 8. After much testing the doctor asked us about her diet and mentioned that one thing we could do to help her would be to use only lean venison and fresh trout. My husband and I looked at each other and laughed. We explained that she was certainly in the right family for that because we hunt and fish and so does our extended family. But we didn't do it to provide meat outside the occasional venison meal or once or twice a year, trout. Of course my husband was thrilled! A documented reason to hunt and fish more!!! One that I couldn't argue with! Well, that's OK. We found that through adding freshly harvested meat and fish to our diet on a regular basis and drinking raw milk (not at the recommendation of the doctor, but that's a different story!) made a huge difference in her health.
As a young homeschooler, she was fascinated with the whole dressing process which afforded us many opportunities to study anatomy up close! It was a very rewarding science lab and we used the chance to teach the kids a lot about a good many things. When she reached 11 years of age, she wanted to hunt too, so we enrolled her in a hunter's safety course and since she had grown up around most of this stuff and learned a respect for firearms at a very early age, she passed the test easily and got her first license at age 12. Unfortunately, that wasn't the case with all of her classmates. She turned out to be a really good shot and harvested deer almost every year. She's in college now and listened a bit wistfully as we planned for today's hunt.
Now, it's little sister's turn. She's been hunting since age 11 when they changed the age if properly mentored. It will be just the two of us today. She's nearly 15 now and still looks forward to the anatomy lesson. We've dissected eyeballs and examined body parts and of course the needed lesson on hydrochloric acid by having the junior hunter puncture the stomach. A lesson they'll never forget and a mistake they won't make again if they can help it. My husband is out hunting with all the guys in the family; uncles who've come home for this big event from Florida and Montana. As they get older, he's taken on the torch of being a bit of a host hunter who drives, etc for them since his dad is getting older too and experiencing some health issues. Unfortunately, we don't get out as often as we'd like and as we get older, there are more demands on our time that take the place of hunting and fishing. But today, we'll participate in the annual ritual once more.
All in all, the hunting experience has been a time to spend together as a family; learning from the wisdom of older generations; listening to the many tales of hunts past. Memories to last a lifetime.
As I look at the clock, I see that it's time for us to head out into the woods so here's praying for a safe hunt and a bountiful harvest.

Monday, November 29, 2010
Tuesday, November 23, 2010
The Humble Dandelion
As part of our Thanksgiving Feast, I mentioned that we break out the first bottle of dandelion wine that we made in the spring. It's been sitting in the coolness of the cellar on a dark shelf working it's wonders and mellowing into a nutty, smooth medicinal tonic that can be used throughout the year.
Caution - any medicinal references mentioned here are strictly for educational purposed based on my research, empirical evidence, experiments and herbal lore and not intended as medical advice of any kind. Herbs can be helpful allies in maintaining good health but they can be powerful medications that should be treated with respect. Used improperly, they can cause adverse reactions, interfere with pharmaceuticals, and even cause death. Hopefully anything you read here will encourage you to do your own research and speak with your health care professional before treating yourself or anyone else.

This versatile plant's leaves are an olde time cleansing tonic when added to a spring salad or wilted with a little bacon and vinegar dressing. Higher in beta carotene than carrots, they are more nutritious than any greens you can buy. Iron and calcium found in dandelion greens is higher than spinach. Among other things the leaves are a good source of phytochemicals, potassium salts, other minerals, vitamins A, B, C, and D. Bitters in dandelions can increase hydrochloric acid and digestive enzymes making it a good choice for tea with you meal. Juicing offers a stronger diuretic action. An infusion of the leaves is a more gentle cleansing remedy for toxic problems like gout. By stimulating the liver and digestive system, toxins are purged. The tincture or wine supplies potassium salts to relieve fluid retention and as a daily detox to maintain good health.
During the cold and flu season, 1 tbsp of dandelion wine helps protect against these "bugs" by clearing toxins from the body that may interfere with proper immune system responses. Rather than acting as a drug that targets a specific symptom, masking the real problem, it benefits the body by encouraging it to do its jobs properly allowing for natural healing to take place.
Herbalists often recommend dandelion roots as a liver stimulant. It's one of the safest herbal remedies. It's a gentle cleansing tonic for jaundice and gallstones. Reducing joint inflammations and other issues by cleansing the blood, the increased support of the liver, kidneys, pancreas, spleen and stomach encourages the body to heal itself. The roasted root makes a good substitute for coffee.
Even the notorious bitter, milky white sap that acts to protect the plant from insects and animals is healing. It's used to remove warts, calluses, pimples, soothe bee stings and ease blisters. A fact that may be useful on the trail.
Wildcrafting dandelions is a rewarding experience. There are no poisonous look alikes and you don't have to look far to find tons of them. The greens are best in the spring when they are young and tender before the bitter sap and flowers appear. When harvesting flowers for wine, be sure to use only the yellow parts of the flower head to avoid the bitter stems. The roots are edible all year but offer the highest amount of nutrients from fall to early spring. A word of caution - be careful where you harvest lawn greens due to increased use of pesticides and weedkillers.
It's dandelion season here in Pennsylvania and I'm looking for some new ways to add them to our diet. We've eaten them prepared like endive with hot bacon dressing but I'd like to learn to use them in other ways as well. Tomorrow I'm hoping to gather dandelion flowers for a batch of wine. It's a wonderful tonic to have on hand to chase away the beginnings of a cold or just for a healthy boost, one spoonful at a time.
A cooking site that I belong to mentioned dandelion fritters. My first thought was a batter dipped flower head deep fried and crispy. But what I found was an interesting recipe that included other healthy vegetables as well. Since the recipe was not precise on other ingredients, I used what I had on hand plus a few wildcrafted leeks. (Probably not a good choice for Sunday morning breakfast before church!!) The batter is one egg, one cup of flour and one cup of milk. To this I added the leaves, flowers and roots of about 5 hearty dandelions, 3-4 wild leeks (bulbs and leaves), one shredded white potato, 1/2 shredded sweet potato, one small zucchini and one small yellow squash, both shredded. These were mixed together in a bowl and cooked on a hot griddle like a pancake. Next time, I'll saute the veggies first and then add the batter. They were a little bitter even with S&P to taste but a little salsa took care of that problem. Maybe maple syrup would be good. Yum!
This post is linked to
TUESDAY TWISTER
Pennywise Platter Thursdays
Hearth and Soul
Caution - any medicinal references mentioned here are strictly for educational purposed based on my research, empirical evidence, experiments and herbal lore and not intended as medical advice of any kind. Herbs can be helpful allies in maintaining good health but they can be powerful medications that should be treated with respect. Used improperly, they can cause adverse reactions, interfere with pharmaceuticals, and even cause death. Hopefully anything you read here will encourage you to do your own research and speak with your health care professional before treating yourself or anyone else.
Taraxacum officinale - the humble, common weed that most folks despise in their lawn is surprisingly full of healing properties. The tag - officinale - means that it's used medicinally. Dandelion is reported to be an effective diuretic, liver and digestive tonic. The roots are also a mild laxative and an antirheumatic effectively purging excess uric acid from the body.
This versatile plant's leaves are an olde time cleansing tonic when added to a spring salad or wilted with a little bacon and vinegar dressing. Higher in beta carotene than carrots, they are more nutritious than any greens you can buy. Iron and calcium found in dandelion greens is higher than spinach. Among other things the leaves are a good source of phytochemicals, potassium salts, other minerals, vitamins A, B, C, and D. Bitters in dandelions can increase hydrochloric acid and digestive enzymes making it a good choice for tea with you meal. Juicing offers a stronger diuretic action. An infusion of the leaves is a more gentle cleansing remedy for toxic problems like gout. By stimulating the liver and digestive system, toxins are purged. The tincture or wine supplies potassium salts to relieve fluid retention and as a daily detox to maintain good health.
During the cold and flu season, 1 tbsp of dandelion wine helps protect against these "bugs" by clearing toxins from the body that may interfere with proper immune system responses. Rather than acting as a drug that targets a specific symptom, masking the real problem, it benefits the body by encouraging it to do its jobs properly allowing for natural healing to take place.
Herbalists often recommend dandelion roots as a liver stimulant. It's one of the safest herbal remedies. It's a gentle cleansing tonic for jaundice and gallstones. Reducing joint inflammations and other issues by cleansing the blood, the increased support of the liver, kidneys, pancreas, spleen and stomach encourages the body to heal itself. The roasted root makes a good substitute for coffee.
Even the notorious bitter, milky white sap that acts to protect the plant from insects and animals is healing. It's used to remove warts, calluses, pimples, soothe bee stings and ease blisters. A fact that may be useful on the trail.
Wildcrafting dandelions is a rewarding experience. There are no poisonous look alikes and you don't have to look far to find tons of them. The greens are best in the spring when they are young and tender before the bitter sap and flowers appear. When harvesting flowers for wine, be sure to use only the yellow parts of the flower head to avoid the bitter stems. The roots are edible all year but offer the highest amount of nutrients from fall to early spring. A word of caution - be careful where you harvest lawn greens due to increased use of pesticides and weedkillers.
Here's an article I wrote earlier this year:
It's dandelion season here in Pennsylvania and I'm looking for some new ways to add them to our diet. We've eaten them prepared like endive with hot bacon dressing but I'd like to learn to use them in other ways as well. Tomorrow I'm hoping to gather dandelion flowers for a batch of wine. It's a wonderful tonic to have on hand to chase away the beginnings of a cold or just for a healthy boost, one spoonful at a time.
A cooking site that I belong to mentioned dandelion fritters. My first thought was a batter dipped flower head deep fried and crispy. But what I found was an interesting recipe that included other healthy vegetables as well. Since the recipe was not precise on other ingredients, I used what I had on hand plus a few wildcrafted leeks. (Probably not a good choice for Sunday morning breakfast before church!!) The batter is one egg, one cup of flour and one cup of milk. To this I added the leaves, flowers and roots of about 5 hearty dandelions, 3-4 wild leeks (bulbs and leaves), one shredded white potato, 1/2 shredded sweet potato, one small zucchini and one small yellow squash, both shredded. These were mixed together in a bowl and cooked on a hot griddle like a pancake. Next time, I'll saute the veggies first and then add the batter. They were a little bitter even with S&P to taste but a little salsa took care of that problem. Maybe maple syrup would be good. Yum!
This post is linked to
TUESDAY TWISTER
Pennywise Platter Thursdays
Hearth and Soul
Monday, November 22, 2010
Thank you!!

I've had an interest in herbs for as long as I can remember. It's been a long, lovely journey that has taught me so much. As a young wife, at first it was a sort of awe...or a reserved idea that I knew they offered valuable healing properties but I was hesitant of an unhealthy interest in them for fear I would be delving into realms that would be contrary to my faith. I felt safe buying a supplement here and there from commercial sources but couldn't bring myself to ingest anything I'd grown or wildcrafted outside the common culinary variety, even though I was learning to identify more and more plants in the wild. And with my identification came more knowledge and an appreciation for folk remedies and herbal lore. More faith in empirical evidence and testimony helped me put things in the proper perspective. I've realized...or just put into practice... the fact that every good and perfect gift is from above, put here for our benefit.
But, I started out with the wrong books. There are lots of books that teach about herbs and their properties and promptly advise against using them in any capacity. What good is that? What I wanted was the knowledge that would help me use God's gifts from field and forest to keep my family healthy and be more self sustaining. So, as my knowledge increased, my book choices became more informed. Much as I hate to admit it, because I'm not especially computer savvy, the Internet gave me so much encouragement. I found a little herb farm, QUIET CREEK HERB FARM AND SCHOOL OF COUNTRY LIVING a few miles away, that offered classes and some great friendships. The world of herbal remedies and whole foods became more accessible to me through the things I learned there. I never realized how many folks were learning the same things and sharing information through organizations like THE WESTON A. PRICE FOUNDATION . Nourishing Traditions quickly became a favorite book at our house. You can find it and many of my favorite resources in the scrolling list on my sidebar. (If you'd like to purchase any of them, simply click on the link to go directly to Amazon. The cost to you is the same but I earn a few cents on each purchase.) I talked with some folks who shared remedies from their childhood. My library grew and I began applying what I was learning to our everyday life and teaching my kids about the world around us and all that it offers for our benefit. I enrolled in an herbology class with ,VINTAGE REMEDIES , who teaches from a Christian perspective, to learn even more. I've realized, too, that I don't need to throw the proverbial "baby out with the bath water" when it comes to herbal lore and application. All the wonderful characteristics of herbal remedies and pleasures are available to me without any compromises required. To God be the Glory!
Back in 1991, I had my first child. In a effort to be a stay at home mom who could supplement our income, I started a dried flower and herb business when I lost my drafting position in the engineering dept of a local plant due to cut-backs. Still, mostly only admiring herbs for their beauty and aroma, I crafted wreaths, arrangements and potpourri. This led to dabbling in aromatherapy with a natural progression to essential oils. It's been a whole new world ever since! Our little house was full of bundles of herbs and flowers hanging to dry. Spices and fragrances filled the air with a wonderful aroma. My garage was soon full of hanging bundles as my gardens produced more and more. Then, we started building our farmhouse and the garage loft quickly became my workshop. The construction crew joked that it was the best smelling garage they'd ever worked in!
With the birth of my second child, it became harder to spend as much time in the shop and I came to the decision that it was not the season in my life to continue a business that took me away from home so much. But I never stopped learning and it soon became clear that as much as I loved that type of craft, I could easily expand right into the soaps, teas and remedies that I've been making on a small scale for our family and as gifts for a long time. Some of my products are gaining a healing reputation and that makes me feel so good. I'm turning these natural elements into things that can benefit others. It's been such a blessing to me. There have been folks who've attempted to steal those blessings away but as my empirical evidence mounts, I realize they can't do it.
Whole foods plays such an important role in our lives now. As you can see from the recipes here it really is all about returning to traditional ways of preparing food. Eliminating processed, boxed, pasteurized, homogenized dead foods in favor of live food as close to it's natural state as we can get it. What has a greater historical, traditional heritage than real food, herbal remedies and fermentation? The Woodwife's Journal is all about my journey back to these traditional lifestyle choices.
My journey took on a special significance when I started to realize some special health needs of my own. There are times when I've felt like giving up but just about that time I'd begin to see positive results and gain a renewed desire to press on. I think God is showing me a lot about myself and teaching me to rest in Him as He increases my awareness of all that He's provided if we just look for it.
So....all that to say a big, big "Thank you!" to everyone who's helped boost my readership! I hope you enjoy what you're reading here and keep coming back to see what's up next. I'd love it if you'd "follow" me so I could see who's out there. It's really encouraging to see your faces. Check out the blog hops and carnivals like TUESDAY TWISTER, REAL FOOD WEDNESDAY and PENNYWISE PLATTER THURSDAY that offer so much information and wonderful whole foods recipes. Comments are welcome. At some points, I'll offer a linking tools so you can share your favorites with other readers, too. If you're not blogging, you can also share by leaving a comment. Thanks so much for your support.
Sharon

Thursday, November 18, 2010
Herbal Medicine Chest - Castor oil packs
Castor oil - Palma Christi - christened "The Hand of Christ" in the Middle Ages because of it's miraculous healing power, this plant yields one of the most amazing healing substances of all time. Castor oil has been used since Ancient times to cure a wide range of diseases and boost immunity. What's so special about this unsaturated, omega-9, triglyceride of fatty acid? Well for starters, it's an amazing anti-inflammatory and analgesic.
Nearly 90% of this fatty acid is ricinoleic acid; a substance unique to castor oil and thought to be the reason for it's awesome healing properties due to it's effectiveness in preventing the growth of many bacteria, viruses, yeast and molds. Pretty impressive, huh? In the past, castor oil has been used internally as a laxative. But it's real value comes from topical application. Transdermally applied to various areas, it works by being absorbed through the skin into the tissues and organs beneath. So what does that mean to you?
Well, in our home, we find relief from various muscular and/or joint pain by rubbing castor oil mixed with a few drops of rosemary essential oil into the area and covering with a cloth or piece of old clothing because it will stain fabric. It's helpful when dealing with gout. We've removed warts by placing a bandaide soaked in castor oil over the offender until it dries up and comes off. It heals fungal infections under finger and toe nails. And a biggie, fluid retention or edema. But there's so much more.
Let's talk about how or why castor oil works. To do that we need to look at how the body works. Everyone is familiar with the circulatory system that delivers blood to all parts of our body. But there's another type of system that also reaches all parts of our body - the lymphatic system. It works hand in hand with our circulatory and digestive systems. When our individual cells assimilate the food and oxygen delivered by the blood, they work like tiny little factories expelling excess fluid and large protein molecules. Due to the impurities and toxins in the food we eat, and the process of changing our food into sustaining nutrients, there are waste byproducts released into the surrounding tissues. And then where does it go? If we didn't have a system in place to remove this waste, we'd soon swell up and die of toxic poisoning and asphyxiation. That's where the lymphatic system comes into play. The many miles of lymphatic vessels and glands move these excess fluids, proteins and waste back to the blood so they can be reused or eliminated. The Thymus gland, the spleen, and Peyer's patches are also part of the lymphatic system. The lymph nodes found all along the vessels act like little filters and produces antibodies when foreign proteins are encountered. You've probably had tender, swollen lymph nodes in the past when your body is fighting an infection. Curiously, aside from the fact that this system manufactures white blood cells, doctors don't seem to know a lot about it.
We've been talking about how the lymphatic system works with the circulatory system but I also mentioned the digestive system. Part of our lymphatics includes areas in the small intestine called Peyer's Patches. Their job is to absorb about 90% of fat molecules which are generally too big to pass through the intestines directly and pass them along the lymphatic system releasing them in to the blood.
So what happens when our lymphatic system isn't doing it's job? A simple test for excess fluid can indicate that our system isn't working properly but the problem is that by the time this test is effective, our fluid levels are 30% higher than normal indicating a serious problem. At this stage the individual cells are pushed apart and away from the blood vessels limiting their ability to absorb nutrients and oxygen and causing them to live in their own waste and toxins. Some cells die and others begin to deteriorate causing organ function to suffer.
What's all this have to do with castor oil? When castor oil is absorbed through the skin, lymphocyte counts increase, lymph flow increases. As you can imagine this has huge positive impact on our tissues and organs as they begin to function more normally. We feel more energised, saliva pH alkalizes and our general feeling of well being increases. Fats, which are the foundation to hormones and other building and repair components, are more easily absorbed. Our body can actually "breathe" at the cellular level allowing everything to function better.
Castor oil packs are the next step in applying castor oil transdermally. It's a little messy and time consuming but very effective at delivering a fast, deep dose of healing ricinoleic acid to tissues by heating a castor oil soaked cloth applied to the body.
Earth Clinic had this to say about castor oil packs:
"A castor oil pack is placed on the skin to increase circulation and to promote elimination and healing of the tissues and organs underneath the skin. It is used to stimulate the liver, relieve pain, increase lymphatic circulation, reduce inflammation, and improve digestion.
Castor oil packs are a traditional holistic treatment for a range of conditions, such as: cholecystitis (inflammation of the gall bladder), poor eliminations, epilepsy, various liver conditions such as cirrhosis and torpid liver, scleroderma, headaches, appendicitis, arthritis, incoordination between assimilations and eliminations, colitis, intestinal disorders such as stricture and colon impaction, incoordination between nervous systems, neuritis, and toxemia.
Castor oil packs are made by soaking a piece of flannel in castor oil and placing it on the skin. The flannel is covered with a sheet of plastic, and then a hot water bottle is placed over the plastic to heat the pack.
A castor oil pack can be placed on the following body regions:
The right side of the abdomen to stimulate the liver; inflamed and swollen joints, bursitis, and muscle strains; the abdomen to relieve constipation and other digestive disorders; the lower abdomen in cases of menstrual irregularities and uterine and ovarian cysts.
Safety precautions: Castor oil should not be taken internally. It should not be applied to broken skin, or used during pregnancy, breastfeeding, or during menstrual flow.
Materials
* Three layers of undyed wool or cotton flannel large enough to cover the affected area
* Castor oil
* Plastic wrap cut 1-2" larger than the flannel (can be cut from a plastic bag)
* Hot water bottle
* Container with lid
* Old clothes and sheets. Castor oil will stain clothing and bedding.
Place the flannel in the container. Soak it in castor oil so that it is saturated, but not dripping. Place the pack over the affected body part. Cover with plastic. Place the hot water bottle over the pack. Leave it on for 45-60 minutes. Rest while the pack is in place. After removing the pack, cleanse the area with a dilute solution of water and baking soda. Store the pack in the covered container in the refrigerator. Each pack may be reused up to 25-30 times.
It is generally recommended that a castor oil pack be used for 3 to 7 days in a week to treat a health condition or for detoxification."
Earth Clinic also offers lots of testimonials from folks who've tried their remedies and provided empirical evidence to their effectiveness and the nice thing is they give both sides to the issue. I can speak for the healing power of castor oil from my own experiences, too. It has been very effective in treating perimenopause issues surrounding cysts, fibroids and irregular bleeding that has led to my anemia. During a period of gallbladder pain, I applied a castor oil pack to the area for several hours and the next day I actually passed several gallstones and the pain subsided.
Note: when applying heat to the castor oil pack, I've found that a heating pad set to the highest temp tolerated seems to work best. That may be for a couple of reasons including better absorption due to open pores or the viscocity of the thick oil thinning but it could also have to do with the bodies ability to rid itself of pathogens at higher body temps. Using a heating pad is also recommended in several places where castor oil packs are discussed.
The Sleeping Prophet - "For forty-three years of his adult life, Edgar Cayce demonstrated the uncanny ability to put himself into some kind of self-induced sleep state by lying down on a couch, closing his eyes, and folding his hands over his stomach. This state of relaxation and meditation enabled him to place his mind in contact with all time and space. From this state he could respond to questions as diverse as, "What are the secrets of the universe?" to "How can I remove a wart?" His responses to these questions came to be called "readings" and contain insights so valuable that even to this day individuals have found practical help for everything from maintaining a well-balanced diet and improving human relationships to overcoming life-threatening illnesses and experiencing a closer walk with God."
Many, many illnesses were healed by Cayce's recommendations to apply castor oil packs. I don't know what to think of his psychic abilities, all I can say is that his treatments were and are effective and he gave all the glory to God. But castor oil's healing history began long before Cayce's time with much praise and glory to God as indicated by the nick name, "Hand of Christ."
Sharing this post with the following folks:
Wednesday, November 17, 2010
Baked Asparagus
Oops! I almost forgot that I promised to share the Baked Asparagus recipe from our Thanksgiving Feast. It's really simple but tastes wonderful. This is for the garlic lovers out there!
Baked Asparagus

Place garlic, asparagus and EVOO in a large baggie. Spinkle with sea salt and course black pepper. Marinate for 20 minutes.
Place in a single layer on a foil lined cookie sheet or shallow baking dish.
Squeeze lemon juice over top.
Drizzle generously with EVOO
Bake at 400° for 20 minutes.
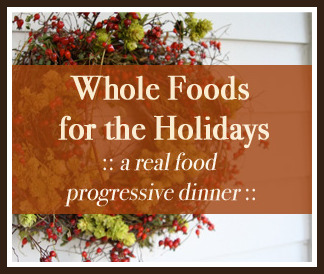
This recipe is linked to Whole Foods for the Holidays hosted by The Nourishing Gourmet.
Baked Asparagus
2 bunches of fresh asparagus - snap off the tough ends by holding the spear by the cut end and snapping the top like a green bean. It will break in just the right place. You can use the ends for veggie stock.
2-3 cloves fresh garlic - chopped fine
Sea salt and course ground pepper
juice of one lemon
EVOOPlace in a single layer on a foil lined cookie sheet or shallow baking dish.
Squeeze lemon juice over top.
Drizzle generously with EVOO
Bake at 400° for 20 minutes.
This recipe is linked to Whole Foods for the Holidays hosted by The Nourishing Gourmet.
Tuesday, November 16, 2010
Wild cranberries!!
 For years, I've heard that there were wild cranberries growing on the mountain near our home but never took the time to find them. This year one of my husbands friends took him to a bog to pick cranberries and we cooked them into a sauce that made my mouth water! As you can imagine, it's kind of a secret and once you're in, folks expect you keep it quiet! So I won't give away the location but I have to tell you that they are much tastier than the commercially harvested, tart, bitter bags of berries you buy at the store.
 So we had to go back for more. It's easy to pick a quart in 15-20 minutes, providing that you don't get stuck in the muck! It's really interesting to see how they grow. I knew there'd be water but I guess I expected it to be...I don't know but what we found was a surprise. Guess it's better to show you than try to describe it. We're actually standing in water but you'd never know it...at first. It's easy to step into a spot and sink in over your boots. Reminded me of the Dead Marshes except it was very much alive. Down in all the dead grasses you can see, there is a bright green moss. The berries weren't growing on top of the water like you see on TV but actually growing in the moss itself! If you reach down to pull the moss apart, there are berries almost under it. Then in other places, the berrt bushes are growing about 6-8" taller than the moss and the berries are hanging from them. It was these tufts of grass and moss that we were actually walking on. Every now and then, there were open spots were you could see the standing water...like looking into a shallow well. At one point I turned to go back and sunk into the water right over my boots and was sucked into the mire below. Thankfully, I had help to pull me out because I could feel myself sinking lower just waiting for my rescuer to get to me. It was a little un-nerving!
 But what an experience and a great photo opp for our homeschool portfolio!

This post is linked to Simple Lives Thursday hosted by GNOWFGLINS. And Whole Foods for the Holidays hosted by The Nourishing Gourmet.
Trout and taters
End of the season, last of the garden meals always seem to taste extra special. Last night we had the very last of my daughter's potato harvest. She saved the little tiny ones and we boiled them, along with the last, fresh green beans I found at the farm stand. We made a simple, creamy, white sauce for them with flour, butter, milk, S and P...it was so good!
The main course was some trout my husband caught, filleted, dredged in flour and quickly fried in a bit of olive oil until crisp on the outside. Mmmm... good!
The main course was some trout my husband caught, filleted, dredged in flour and quickly fried in a bit of olive oil until crisp on the outside. Mmmm... good!
Monday, November 15, 2010
Olde Fashioned Plum Pudding

Here's an old time holiday favorite that folks don't take time to enjoy anymore. They're very easy to make and extremely rich and yummy to eat. There are lots of ingredients and it takes a little time but sooooo worth it!
Plum Pudding

1 cup milk
soak bread in milk and beat.
Mix together
2 slightly beaten eggs
1 cup rapadura sugar
1/4 cup orange juice
6 oz. finely chopped suet1 tsp vanilla
Stir into above
Sift together
1 cup flour
1 tsp soda1/2 tsp salt
2 tsp cinnamon1 tsp cloves
1 tsp mace
Add to sifted ingredients and mix well
2 cups raisins
1 cup pitted dates
1/2 cup chopped mixed candied fruits and peels
1/2 cup chopped walnuts
Stir into bread mix and pour into a greased 2 quart mold or glass mixing bowl.Cover with foil.
Tie with string.
Place on a rack in a deep kettle.
Add 1" boiling water
Cover and steam 3-1/2 hours adding water as needed.
Cool 10 minutes - unmold
Serve with warm hard sauce or cream.
Hard Sauce

Cream until fluffy
1/2 cup butter 1 cup powdered sugar
Stir
1 TBSP cornstarch into 1 cup cold water
until dissolved. Cook and stir until thick and bubbly.
Add to creamed mix.
Add 1 tsp lemon juice and 1-1/2 tsp vanilla
Serve warm over pudding.
This post is linked to Monday Mania hosted by The Healthy Home Economist.
Sweet Potato Soufflé

Here's a holiday favorite that is a super sweet recipe my extended family asks for every year.
Sweet Potato Soufflé
Butter a 11x13" glass baking dish.
Combine the following in a food processor or blender;
2 large cans of sweet potatoes (or buy fresh and make your own)
1 cup sugar (at the very least, I'll use evap cane juice but you could use sucanat,
maple syrup, date sugar or rice syrup, adjust to taste)
4 beaten eggs (free range)
1 cup milk (organic, raw if you can get it)
1 tsp salt
1/2 cup butter
2 tsp vanilla
Pour into baking dish
Topping
2 cups brown sugar (Evap cane juice plus 1 tsp organic molasses per cup or sucanat)
2/3 Cup flour (use whatever type you like)
2/3 cup butter
2 cups chopped pecans
Sprinkle on top and bake at 350° for 35 minutes.
Pennywise Platter Thursday
Thursday, November 11, 2010
Our Thanksgiving Feast
Some years we spend our holiday with family and once or twice, we've spent it with friends. It's always fun to see the different traditions that folks practice and what foods make up their favorite Thanksgiving feast. As new folks are added to each group or family, they often bring new foods and traditions with them and begin to blend and share until our different backgrounds have melded together nationalities and ethnic customs and foods into new "traditions" that carry on to the next generation.
I'll have to admit that my least favorite part of a holiday away from home is that there are NO leftovers to munch on. No turkey to turn into stew to put over biscuits, No sweet potatoes to warm up for a midnight snack. No pie for breakfast...oops! I may have said too much!
So sometimes we have a quiet Thanksgiving at home with some homestyle favorites that I've grown up enjoying and some new ones that I've added. Here's a list of my favorites:
A fresh tossed salad with iceburg, tomatoes, celery, onion, cukes, seedless grapes and toasted pecans with my sister-in-law's variation on italian dressing with balsamic vinegar and olive oil. (See how the traditions meld?)
Free range turkey with homemade stuffing. (And I'm especially thankful that we won't be having StoveTop!!!)
Free range turkey has a wonderful flavor but they often tend to be a little tough or stringy.
To make my stuffing I melt butter in my cast iron skillet and brown my onion and celery. Next I add the bread cubes. These can be any kind you have on hand or even *gasp* bags from the store. I toss the cubes in the melted butter (along with the onions and celery) until coated, then I begin to sauté them until a little toasted. At this point, I sprinkle the top of the panful of cubes with a generous coat of poultry seasoning. Then a little salt and pepper. Stir it all together. Now it's ready for the bird or I can add other things to it like mushrooms sautéed in a separate pan or chestnuts peeled, chopped and toasted.
Sweet Potato Soufflé - a recipe from a friend added to our favorites list. I'll share it with you later this week.
Mashed potatoes - standard with a little milk, butter, S&P - I prefer white potatoes to golden or yellow ones.
Baked asparagus with lots of OO and garlic - another that I'll share this week.
Fresh cranberry sauce - I'm so excited! My husband went out on the mountain to pick wild cranberries! I cooked them up and made sauce. They are so yummy! Once my daughter gets home for the holiday, we're going to go out as a family to pick more. What a treat!
Apple Pie - always made from scratch
Pumpkin Pie or
Cheesecake - the last in our Pumpkinpalooza! week of recipes.
Ahhh! It fills the house with an aroma that just says, "Home."
And our newest tradition is the first sampling of each year's batch of dandelion wine that's been mellowing since Spring.
Goosie's been living on mainly college food for at least 2 meals/day for the last 3 months and she's put in a request for a home cooked Thanksgiving but since we can't be selfish with the little time she'll be here, we'll spend the holiday with the family and I'll make a few of her favorites for leftovers to take back to school. And for us too!
Share a comment telling us about your favorite Thanksgiving menu.
Wednesday, November 10, 2010
Pumpkin Cheesecake

Pumpkinpalooza! wraps up this years celebration with this very special recipe just in time for the holidays.
Pumpkin Cheesecake
This recipe makes a great follow up to a Thanksgiving feast. We've made some changes to the original to include more whole foods options that will make this luscious dessert a healthier choice.
For the crust;
combine the following and press into the bottom and 1 inch up the side of a 9 inch spring form pan.Bake in preheated 350° oven for 6-8 minutes. (don't let it brown) Remove and cool.
1-1/2 cups graham crackers
1/4 cup evap cane juice
1/3 cup butterFor the cheesecake;
Cream until fluffy.24oz. cream cheese
1-1/4 cup evap cane juice plus 1 tsp organic molasses
Add and beat
16 oz. prepared pumpkin
2/3 cup heavy cream
2 free range eggs
2 free range eggs
Add, mix well
2 T cornstarch
1-1/4 tsp ground cinnamon
1/2 tsp nutmeg
Pour into crust. Bake at 350° for 55-60 minutes or until edge is set.
For topping;
Mix together
16 oz. sour cream at room temp.
1/4 - 1/3 cup evap cane juice
1 tsp vanilla
Pour evenly over top of warm cheesecake. Bake an additional 5 minutes.
Cool on rack.
Remove side of spring form pan.
Chill several hours.
Garnish with fresh borage flowers, orange peel swirls or mint leaves if desired.
If you'd like, you can grab my button from the sidebar to share with others.
Great news! If all is working properly, you should be able to join in the Pumpkinpalooza! celebration by sharing your favorite recipes. Here's all I ask;Recipes must be made with "real" food, not boxed, canned, or processed foods.
Links can be new or old, but be sure to play fair and leave a link back to this post within it. You might want to let your readers know that you’re participating so that they can see all of the recipes posted here as well.
Let's celebrate! Share your recipes with us!
If you're already blogging, great! Just follow the steps below. But if not, please share you recipe in the comment section.
Here's what to do...
Copy and paste your permalink (direct url) into the form below along with your name and recipe name.
Please leave a comment below.
This recipe is linked to FIGHT BACK FRIDAY hosted by Food Renegade over at REAL FOOD MEDIA. Click on the button below to see all the healthy recipes and tips others have shared today.

Tuesday, November 9, 2010
Pumpkin Pecan Biscotti

Pumpkin Pecan Biscotti
Combine first 8 ingredients in a large bowl; stir well.
3 1/2 cups all-purpose flour
1 1/2 cups firmly packed brown sugar2 teaspoons baking powder
1/2 teaspoon salt
1 tsp cinnamon
1/2tsp grd ginger
1/4 tsp nutmeg
1/4 tsp grd cloves
Combine, stirring well with a wire whisk.
1/2 cup pumpkin puree
2 large eggs, lightly beaten
1 TBSP vanilla extract
Slowly add pumpkin mixture to flour mixture, stirring until dry ingredients are moistened. (Mixture will be very crumbly; it will gradually become moist after stirring.)
Melt butter in a large skillet over medium heat; add macadamia nuts. Cook, stirring constantly, until nuts are browned. Remove from heat, and cool completely.
2 TBSP butter
1 cup pecans coarsely chopped
1 cup pecans coarsely chopped
Knead or gently stir cooled nuts into dough.
Place dough on a lightly floured surface, and divide into 4 portions. Lightly flour hands, and shape each portion into a 1" x 15" log. Place logs 3" apart on parchment lined cookie sheets.
Bake at 350° for 23 minutes.
Cool logs 15 minutes. Reduce oven temperature to 300°.
Cut each log crosswise into 1/2" slices, using a serrated knife. Place slices on parchment. Bake at 300° for 15 minutes.
Turn oven off, flip slices over and dry in oven for 15 minutes.
Cool completely on wire racks.
Store in air tight container.
For gift giving, I like to use fancy recycled glass jars from nuts or pretty tins.


This post is linked to A Little Bit of Spain where Diane is hosting bread recipes for

Great news! If all is working properly, you should be able to join in the Pumpkinpalooza! celebration by sharing your favorite recipes. Here's all I ask;
Recipes must be made with "real" food, not boxed, canned, or processed foods.
Links can be new or old, but be sure to play fair and leave a link back to this post within it. You might want to let your readers know that you’re participating so that they can see all of the recipes posted here as well.
Let's celebrate! Share your recipes with us!
If you're already blogging, great! Just follow the steps below. But if not, please share you recipe in the comment section.
Copy and paste your permalink (direct url) into the form below along with your name and recipe name.
Please leave a comment below.
Monday, November 8, 2010
Frosted Pumpkin Bars

Frosted Pumpkin Bars
Combine the following and pour into a a large, greased and floured sheet pan.
4 eggs - beaten
1 cup oil
2 cups evap cane juice
1 cup prepared pumpkin
1/2 tsp salt
2 tsp cinnamon
1 tsp soda
1 tsp baking powder
2 cups flour
1 cup nuts or raisins or both
Bake @ 350° for 20-25 minutes until toothpick comes out clean.
Frosting
Mix together
3 oz cream cheese
6 TBSP softened butter
3/4# powdered sugar
1 tsp vanilla
1 tsp milk - add a little more as needed to make smooth.
Sprinkle with nuts.
Great news! If all is working properly, you should be able to join in the Pumpkinpalooza! celebration by sharing your favorite recipes. Here's all I ask;
Recipes must be made with "real" food, not boxed, canned, or processed foods.
Links can be new or old, but be sure to play fair and leave a link back to this post within it. You might want to let your readers know that you’re participating so that they can see all of the recipes posted here as well.
Let's celebrate! Share your recipes with us!
If you're already blogging, great! Just follow the steps below. But if not, please share you recipe in the comment section.
Copy and paste your permalink (direct url) into the form below along with your name and recipe name.
Please leave a comment below.
Sunday, November 7, 2010
Pumpkin Chocolate Chip Cookies

We're going to use organic, whole foods ingredients as much as possible.
Pumpkin Chocolate Chip Cookies
Combine the following:
2 cups flour
1 cup oatmeal
1 tsp baking soda
1 tsp cinnamon
1/2 tsp salt
Cream
1 cup butter
Gradually add
1 cup brown sugar
1 cup evap cane juice
Add
1 egg
1 tsp vanilla
Mix well
Add
1 cup pure pumpkin
Add
1 cup semi-sweet choc. chips
Drop by 1/4 cup dollops onto lightly greased cookie sheet. Shape into pumpkins. Add raisins or chocolate chips to make a face if desired.
Bake at 350° 20-25 minutes until firm and lightly brown.
If you'd like, you can grab my button from the sidebar to share with others.
Great news! If all is working properly, you should be able to join in the Pumpkinpalooza! celebration by sharing your favorite recipes. Here's all I ask;
Recipes must be made with "real" food, not boxed, canned, or processed foods.
Links can be new or old, but be sure to play fair and leave a link back to this post within it. You might want to let your readers know that you’re participating so that they can see all of the recipes posted here as well.
Let's celebrate! Share your recipes with us!
If you're already blogging, great! Just follow the steps below. But if not, please share you recipe in the comment section.
Here's what to do...
Copy and paste your permalink (direct url) into the form below along with your name and recipe name.
Please leave a comment below.
Saturday, November 6, 2010
Pumpkin Smoothie

Pumpkin Smoothie
Blend the first 3 ingredients together in a blender or Vitamix.
2 cups cooked pumpkin or winter squash
1/2 cup evap cane juice
2 free range eggs
Add the following organic spices to taste:
cinnamon
nutmeg
clove
Add raw milk to make 6-8 cups. Blend quickly to cream together.
Chill and enjoy!
Great news! If all is working properly, you should be able to join in the Pumpkinpalooza! celebration by sharing your favorite recipes. Here's all I ask;
Recipes must be made with "real" food, not boxed, canned, or processed foods.
Links can be new or old, but be sure to play fair and leave a link back to this post within it. You might want to let your readers know that you’re participating so that they can see all of the recipes posted here as well.
Let's celebrate! Share your recipes with us!
If you're already blogging, great! Just follow the steps below. But if not, please share you recipe in the comment section.
Here's what to do...
Copy and paste your permalink (direct url) into the form below along with your name and recipe name.
Please leave a comment below.
If you'd like, you can grab my button from the sidebar to share with others.
This post is linked to
TUESDAY TWISTER
Tasty Tuesday
Click to see all the fun recipes folks are sharing there.
Friday, November 5, 2010
Cream of Pumpkin Soup

Cream of Pumpkin Soup
In a large pot over meduim heat, sauté for 5 minutes.
3 T olive oil
1 onion chopped
1 carrot diced
1 large red bell pepper chopped
Add to pot and sauté 5 more minutes
2 garlic cloves diced
1-1/4# pumpkin-peeled, seeded and cubed
Add to pot and bring to boil. Cover, reduce heat and simmer until pumpkin is tender.
1 cup baking potato - peeled and diced
5 cups chicken broth or broth of your choice
1 T white wine or cider vinegar
1 strip orange zest or 1/4 cup orange juice
1/8 tsp dried thyme
1 bay leaf
dash ground cloves
1/2 tsp sea salt
Remove from heat and allow to rest 5 minutes off heat.
Remove orange peel and bay leaf.
Puree in food processor. Strain
Stir in cream just until heated. Taste and add more salt if needed.
Garnish with apple slices.
1/2 cup heavy cream
1/2 cup diced apple
This recipe is linked to FIGHT BACK FRIDAY hosted by Food Renegade over at REAL FOOD MEDIA. Click on the button below to see all the healthy recipes and tips others have shared today.
If you'd like, you can grab my button from the sidebar to share with others.
Great news! If all is working properly, you should be able to join in the Pumpkinpalooza! celebration by sharing your favorite recipes. Here's all I ask;
Recipes must be made with "real" food, not boxed, canned, or processed foods.
Links can be new or old, but be sure to play fair and leave a link back to this post within it. You might want to let your readers know that you’re participating so that they can see all of the recipes posted here as well.
Let's celebrate! Share your recipes with us!
If you're already blogging, great! Just follow the steps below. But if not, please share you recipe in the comment section.
Here's what to do...
Copy and paste your permalink (direct url) into the form below along with your name and recipe name.
Please leave a comment below.
Wednesday, November 3, 2010
Pumpkin Spice Creme Brulee

What are phytochemicals? You've heard of antioxidants, right? Fruits, vegetables, grains and legumes are loaded with these health promoting substances. These little powerhouses include vitamins, minerals and enzymes that help prevent cancer and other diseases by protecting our cells from the damages of oxidation. Reseachers have discovered that these foods also contain phytochemicals that give them color, flavor and natural disease resistance. This group of biologically active substances include bioflavonoids, isoflavones, indoles, saponins just to name a few. Each group fights cancer in it's own way. Cancer is a multistep process and phytochemicals seem to work by blocking one or more of these steps.
Welcome to the first recipe in our Pumpkinpalooza! celebration week!
Pumpkin Spice Creme Brulee
We clipped this one out of the newspaper years ago. Yummy!
Preheat oven to 300°.
In a large bowl, whisk together the following:
2 cups heavy cream
2 tsp. rum or vanilla extract
8 egg yolks (free range)
1/3 cup evap cane juice
1 cup pure organic pumpkin
1/4 tsp cinnamon
1/4 tsp ground nutmeg
1/4 tsp ground ginger
Skim off any foam or bubbles.
Divide mixture into 6 ramekins or custard cups.
Place in hot water bath in baking dish and bake until set around the edges. (about 30-40 minutes)
Remove in water bath until cooled. Remove cups and let set 2 hours (up to 2 days) in the fridge.
Remove from fridge 30 minutes before serving.
Sprinkle tops with about 2 teaspoons of sugar and brown carefully with a kitchen torch or under the broiler for a few minutes. Allow to cool for 5 minutes before serving.
If you'd like, you can grab my button from the sidebar to share with others.
Great news! If all is working properly, you should be able to join in the Pumpkinpalooza! celebration by sharing your favorite recipes. Here's all I ask;
Recipes must be made with "real" food, not boxed, canned, or processed foods.
Links can be new or old, but be sure to play fair and leave a link back to this post within it. You might want to let your readers know that you’re participating so that they can see all of the recipes posted here as well.
Let's celebrate! Share your recipes with us!
If you're already blogging, great! Just follow the steps below. But if not, please share you recipe in the comment section.
Here's what to do...
Copy and paste your permalink (direct url) into the form below along with your name and recipe name.
Please leave a comment below.
I've posted this recipe on the REAL FOOD WEDNESDAY blog carnival. Check out all the wonderful recipes and information available there.
Baked Apple Dip
Today's Applemania! recipe comes from my friend Karen's kitchen.
I guess you'd say it's a snack or appetizer and it sounds like a great addition to our Applemania! list and just in time for those football parties. She shared the basics for this recipe from the Ritz box but I don't have a name for it so we'll call it;
Karen's Baked Apple Dip
Spread 8 oz. Cream Cheese over bottom of small, shallow baking dish. (It's yogurt day so tomorrow I'll be making my own creamed cheese)
Top with chopped apples tossed with seedless raspberry jam.
Sprinkle with granola. (I'm going to try using Food for Life's Sprouted Ezekiel cereal)
Bake at 350° for 20 min.
Serve with cinnamon Ritz crackers. (I'm gonna make homemade crackers.)
Tomorrow....Pumpkinpalooza! I'm still working on setting up a link so you can post your favorite recipes too.
Tuesday, November 2, 2010
Chicken Caesar Salad
It's been a hectic day here and I haven't had time to post today but I'd like to link you to the gals at some of my favorite blogs. Check out the wonderful salad recipes they've shared today. There are lots of apple salad ideas there to fill the Applemania! post today
This one is a favorite on busy days. As I'm typing the post I'm thinking that apples might be a nice addition to this zesty salad. As always, use fresh whole foods, free range and/or organic if you can find them.
Caesar Salad
2 heads romaine lettuce - chopped
1 lemon - juiced
2 cloves garlic - minced
1/4 cup EVOO
Parmesan cheese
croutons
grilled chicken breasts - cubed
Coat large bowl with EVOO. Add lettuce and garlic. Add lemon juice to taste. Sprinkle generously with Parmesan cheese. Add croutons and toss.
Serve with a portion of chicken on top.
We use this recipe when we're in a hurry. It's filling and quick to put together. The chicken can be prepared ahead of time and stored short term in the fridge or frozen.
Subscribe to:
Posts (Atom)
Popular Posts from the Past 30 Days
-
 The gift that keeps on giving! Win this 30 minute Mozzarella Kit. Consider it a Christmas present to yourself! We had a great time making...
 -
Welcome to Post # 10 of our Herbal Medicine Chest. We've been exploring creating our own herbal preparations to help us put together...
-
Castor oil - Palma Christi - christened "The Hand of Christ" in the Middle Ages because of it's miraculous healing power, this...
-
 My daughter had a favorite pair of socks that had stood the test of time. But on wooden floors, they're bound to give out eventually. ...
 -
This is the 2nd week of our Herbal Medicine Chest . Check out the other posts in this series by clicking on the Herbal Medicine Chest p...

